This is a step by step guide to show you how to scale the image size of an existing gif. GIF Studio can scale the width and height of the photo to precise pixel values. This is especially useful to share the gif to social networks that have gif size constraints.
Ready for action, GIF Studio Apk is now available on Google PlayTM.
-
Android, Google Play and the Google Play logo are trademarks of Google Inc.
Step 1
In the GIF Studio “Album Screen”, click on the animated gif to open the “Playing Screen”. Alternatively, user can use “My Folder” or “Gallery” Apps to locate the file and share via “GIF Studio”. This would automatically open the “Playing Screen” which is shown in Step 2.
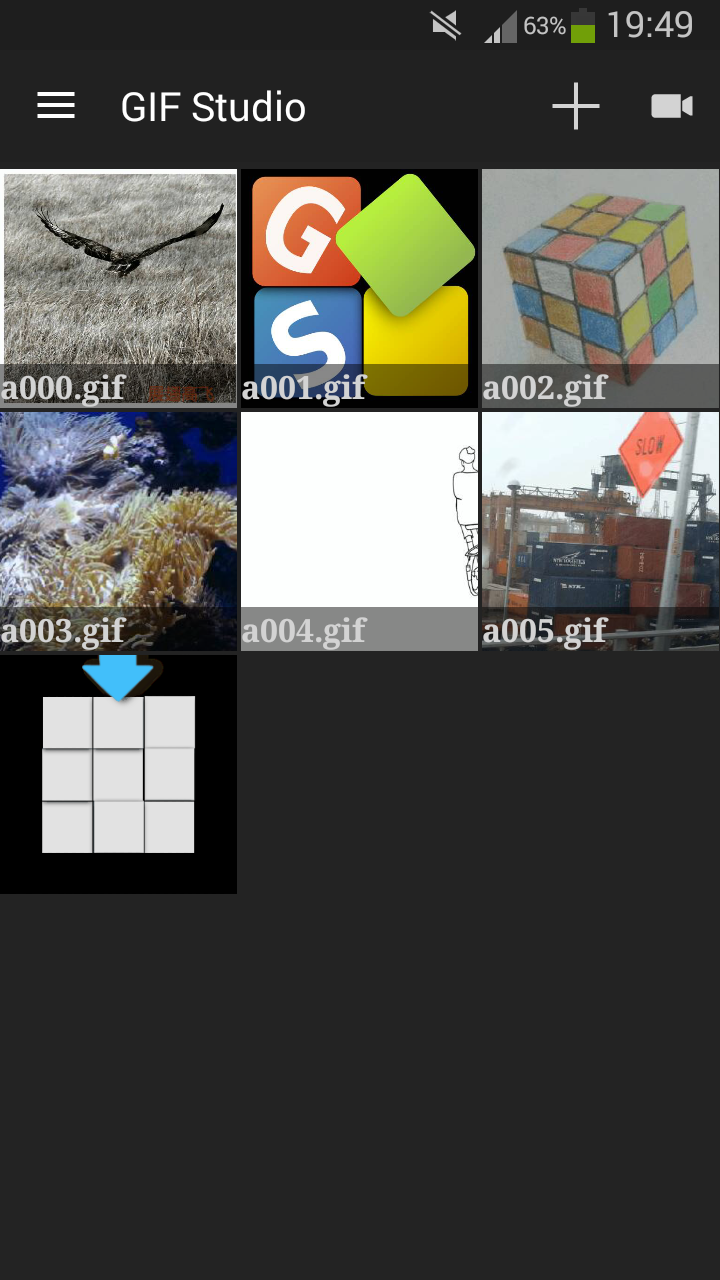
GIF Studio Album Screen
Step 2
In the “Playing Screen”, You can view the animation and change its playing speed by sliding up and down.
Click “Editor” to modify the gif’s size on the top right of the screen.
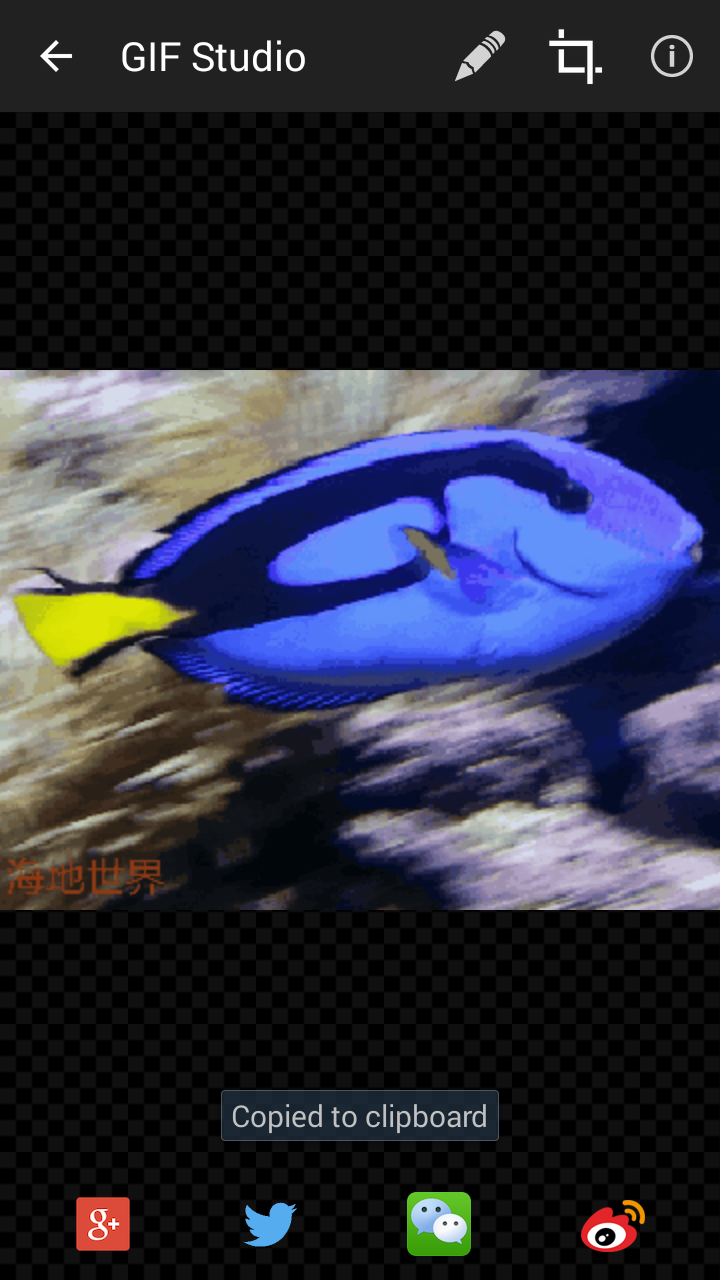
GIF Studio – Playing Screen
Step 3
In the “Gif Configuration Screen”, change the image size by sliding the horizontal bar to left or right. Alternatively, user can key in the width/height values in the text fields directly. If you change the width of the image, the height will be updated automatically. The app will keep the image width and height ratio by default. User can unlock the image ratio by click the icon in the bottom left of the screen.

GIF Studio – Gif Configuration Screen
Step 4
Press “Save” icon at the top right of the screen to store the file to the phone. In the “Output Configuration Screen”, user can rename the file or select a different path.
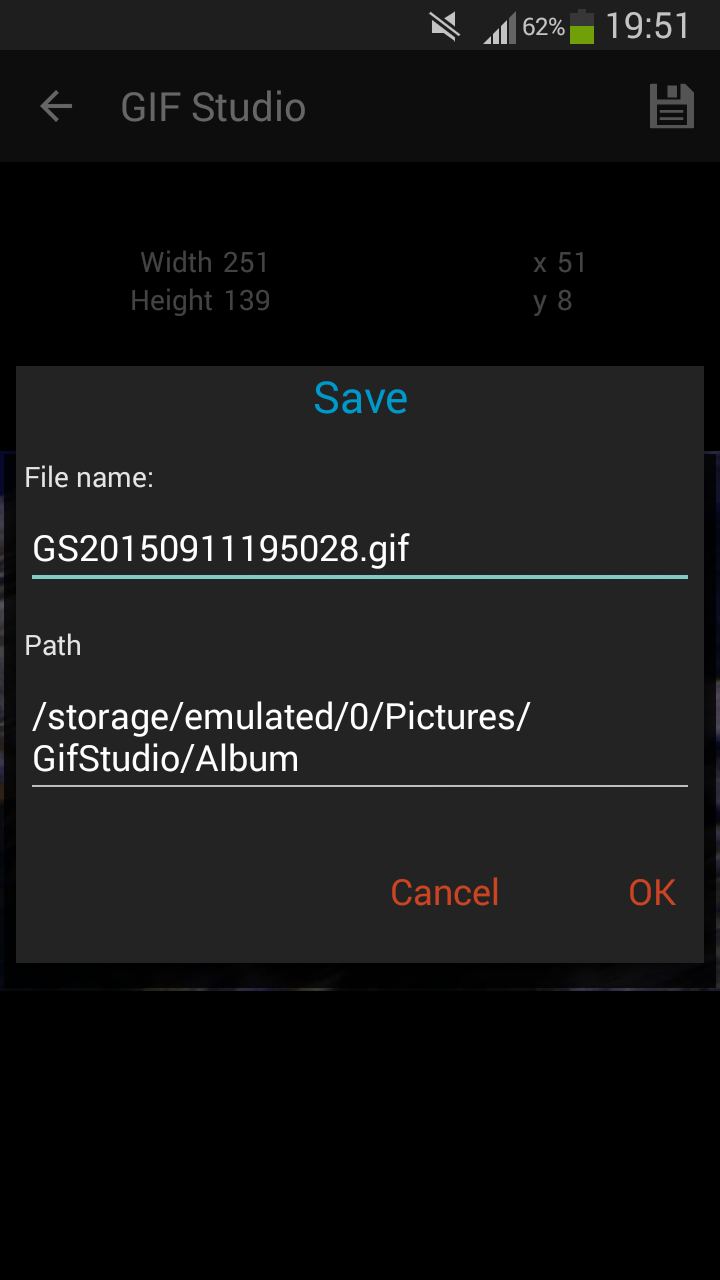
GIF Studio – Output Configuration Screen
Step 5
The “Playing Screen” will pop up after the saving process. User can choose to share the animation with friends or do further editing. The default output path is in /sdcard/Pictures/GifStudio/Album folder.
GIF Studio – Playing Screen
-
Further Reading
For more info, check out the following articles:
- GIF Studio – How to
- GIF Studio – frequently asked questions (FAQ)
- GIF Studio-Making a greeting card in just a few steps.
- How to share animated GIFs with Google Plus.
- How to make animated GIFs from photos
- GIF Studio-Screen Shots
- GIF Studio-Album

")